نقد و بررسی
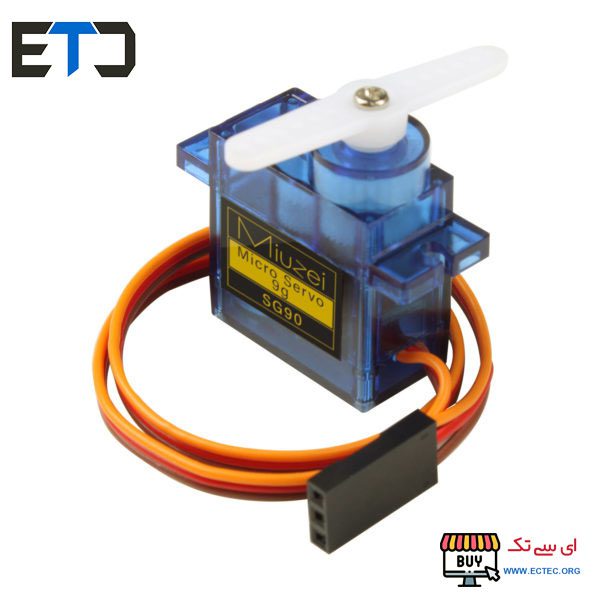
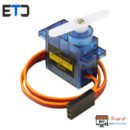
سرو موتور SG90- ولتاژ کاری:4.8 ولت
- ولتاژ قابل اعمال:3 تا 7.2 ولت
- درجه ی چرخش:180 درجه (90 درجه به هر طرف)
- سرعت چرخش: 0.12 ثانیه به ازای 60 درجه چرخش
- وزن:9 گرم
سرو موتور SG90
سرو موتور ها نوعی موتور دی سی می باشند که با هدف تعیین دقیق موقعیت شفت سرو طراحی و ساخته شده اند.سرو ها دارای سه سیم می باشند که یکی به عنوان تغذیه مثبت دیگری به عنوان زمین و سیم سوم به عنوان ورودی دیوتی سایکل سرو موتور تعیین شده است.
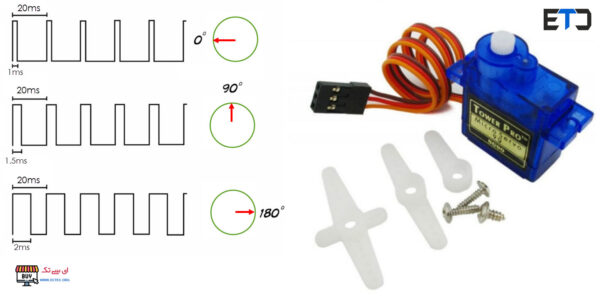
سرو موتور ها بر اساس درجه چرخش،گشتاور،سرعت چرخش و نوع شفت خریداری می شوند.سرو موتور SG90 دارای چرخش 180 درجه می باشد که با اعمال یک پالس مربعی به پایه سوم این سرو موتور میتوان جهت چرخش و مقدار چرخش را تعیین کرد.
سرو موتور SG90 می تواند 90 درجه به چپ و 90 درجه به راست چرخش کند یعنی با اعمال دیوتی سایکل بیش از 1.5 میلی ثانیه به سمت راست چرخش کرده و با اعمال دیوتی سایکل کمتر از 1.5 میلی ثانیه به سمت چپ چرخش میکند.باید توجه کرد که مقدار چرخش بسته به مقدار پالس ورودی از میکروکنترلر دارد.
ویژگی های سرو موتور SG90:
- ولتاژ کاری:4.8 ولت
- ولتاژ قابل اعمال:3 تا 7.2 ولت
- درجه ی چرخش:180 درجه (90 درجه به هر طرف)
- سرعت چرخش: 0.12 ثانیه به ازای 60 درجه چرخش
- وزن:9 گرم
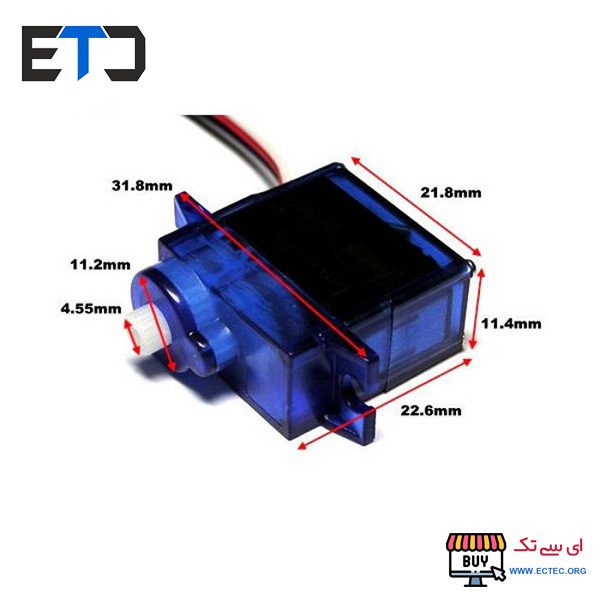
- ابعاد:23 در 12 در 29 میلی متر
- وزن قابل تحمل بر روی شفت:1.8 کیلو گرم
توابع سرو موتور SG90 در آردوینو:
برای انتخاب پایه خروجی سرو موتور Servo.attach()
نوشتن مقدار چرخش در سرو موتور Servo.write()
نوشتن به صورت میکرو ثانیه Servo.writeMicroseconds()
Servo.read()
Servo.attached()
Servo.detach()
ترتیب پایه های سرو موتور SG90:
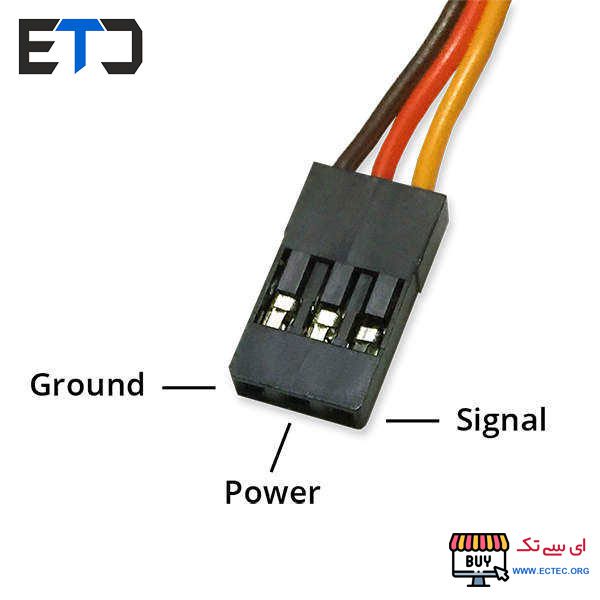
نکته:در صورتی که هنگام کار با سرو موتور هنگام اتصال به میکرو دچار کمبود جریان کافی شدید و میکرو مدام ریست می شد کافیست یک خازن با مقدار بین 470 تا 1000 میکرو فاراد بین دو پایه ی تغذیه سرو موتور قرار دهید.
ابعاد سرو موتور SG90:
سرو موتور SG90
About SG90 Servo Motor:
Servo motor is a component that can rotate its handle (usually between 0° and 180°). It used to control the angular position of the object.
- Application Fields: remote control helicopters, micro robot, robot arm and boats. ALL kind of R/C Toys and Arduino experiments
- Interface Type: compatible with JR & Futaba interface.
- No Load Running Speed: 0.12second/60at 4.8V.Rotary Angle: 180°
- Stall Torque (4.8V): 17.5oz /in (1kg/cm).Dead band width: 7usec
- Operating voltage: 3.0V~7.2V.
Specification:
-Size: 23*12.2*29mm.
-Working voltage:3V – 6V
-Operating speed:0.12second/ 60degree ( 4.8V no load )
-Stall Torque (4.8V): 1.5kg/cm
– Operable Temperature range:-30 to +60
-Dead band width: 7usec
– Rotary Angle: 180°
– Temperature range: -30 to +60
– Servo Cable Length: 250mm.
-Weight: 9g/each.
-Gear/Case Type: plastic/plastic.
Troubleshooting
Sometimes your servo may misbehave if you decide to run it directly from the Arduino. The reason for this is that the servo draws considerable power, especially during start-up, and this can cause the Arduino board to reset.
If this happens, you can usually fix this by placing a fairly large electrolytic capacitor (470uF – 1000uF) between GND and 5V
Pin-out
The servo motor used in this example includes three pins:
-
- VCC pin (typically red) needs to be connected to VCC (5V)
- GND pin (typically black or brown) needs to be connected to GND (0V)
- Signal pin (typically yellow or orange) receives the PWM control signal from an Arduino’s pin.

How It Works
After connecting VCC pin and GND pin to 5V and 0V, respectively, we can control the servo motor by generating proper PWM signal to signal pin.
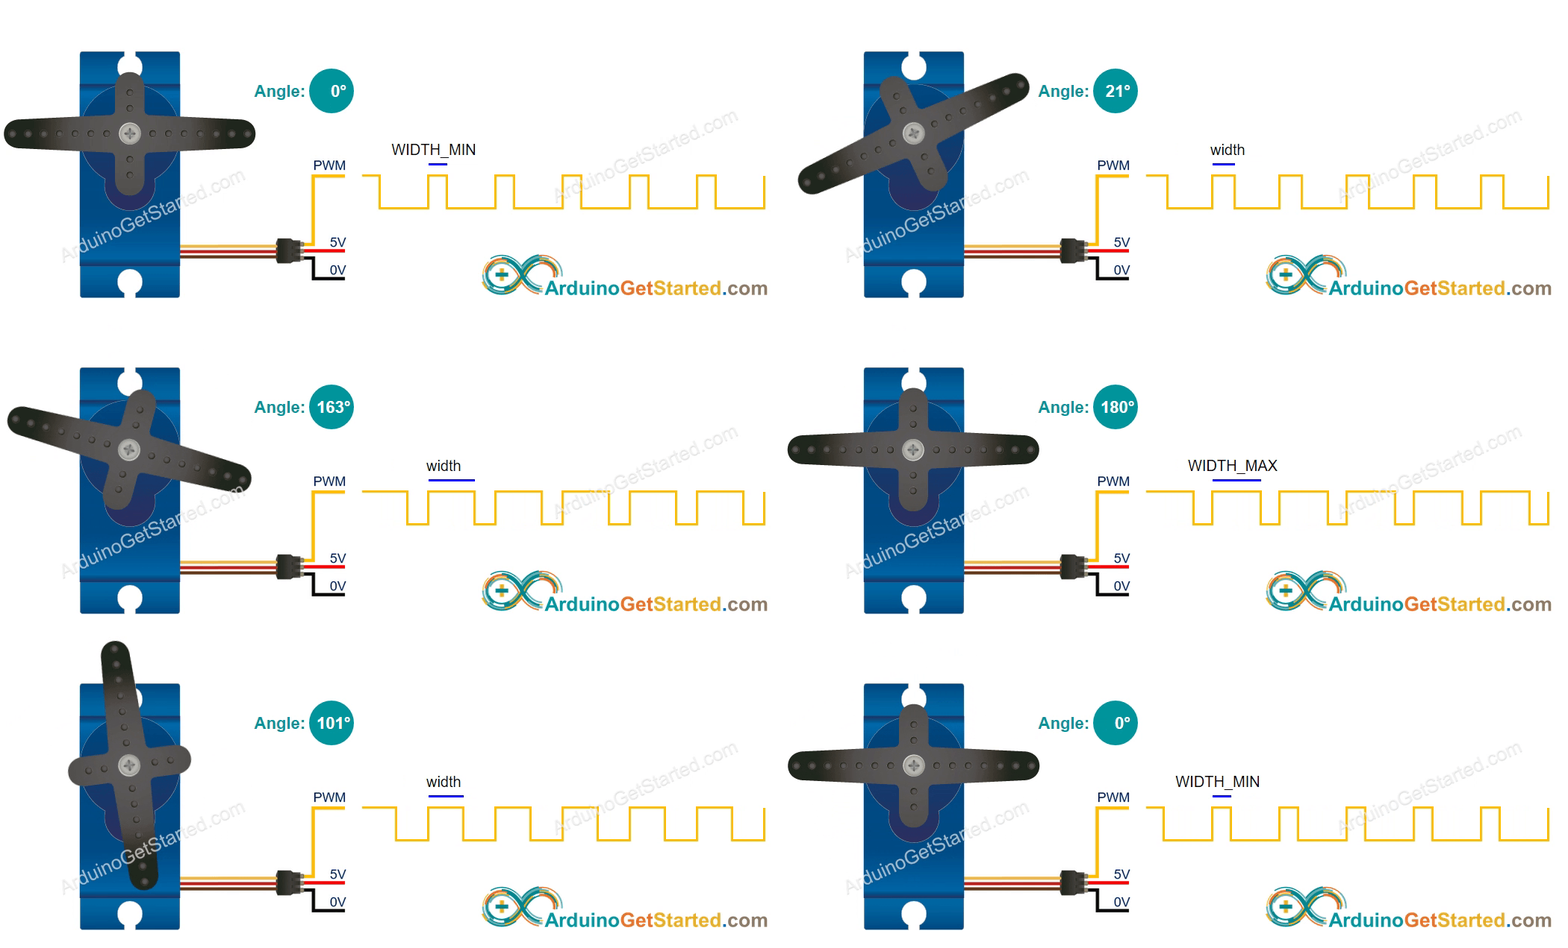
The angle is determined by the width of PWM signal.
سرو موتور SG90
Datasheet of the servo motor provides us the following parameters:
- Period of PWM (PERIOD)
- Minimum width of PWM (WIDTH_MAX)
- Maximum width of PWM (WIDTH_MIN)
These parameters are fixed in Arduino Servo library. We do NOT need to know the value of parameters.
The angle is determined as follows:
-
- If PWM’s width = WIDTH_MIN, the servo motor rotates to 0°.
- If PWM’s width = WIDTH_MAX, the servo motor rotates to 180°.
- If PWM’s width is between WIDTH_MIN and WIDTH_MAX, the servo motor rotates to angle between 0° and 180° in proportion.
سرو موتور SG90
Arduino – Servo Motor
Some of Arduino pins can be programmed to generate PWM signal. We can control the servo motor by connecting the servo motor’s signal pin to an Arduino’s pin, and programming to generate PWM on the Arduino’s pin.
Thanks to Arduino Servo library, controlling servo motor is a piece of cake. We even do NOT need to know how servo motor works. We also do NOT need to know how to generate PWM signal. We JUST need to learn how to use the library.
Wiring Diagram
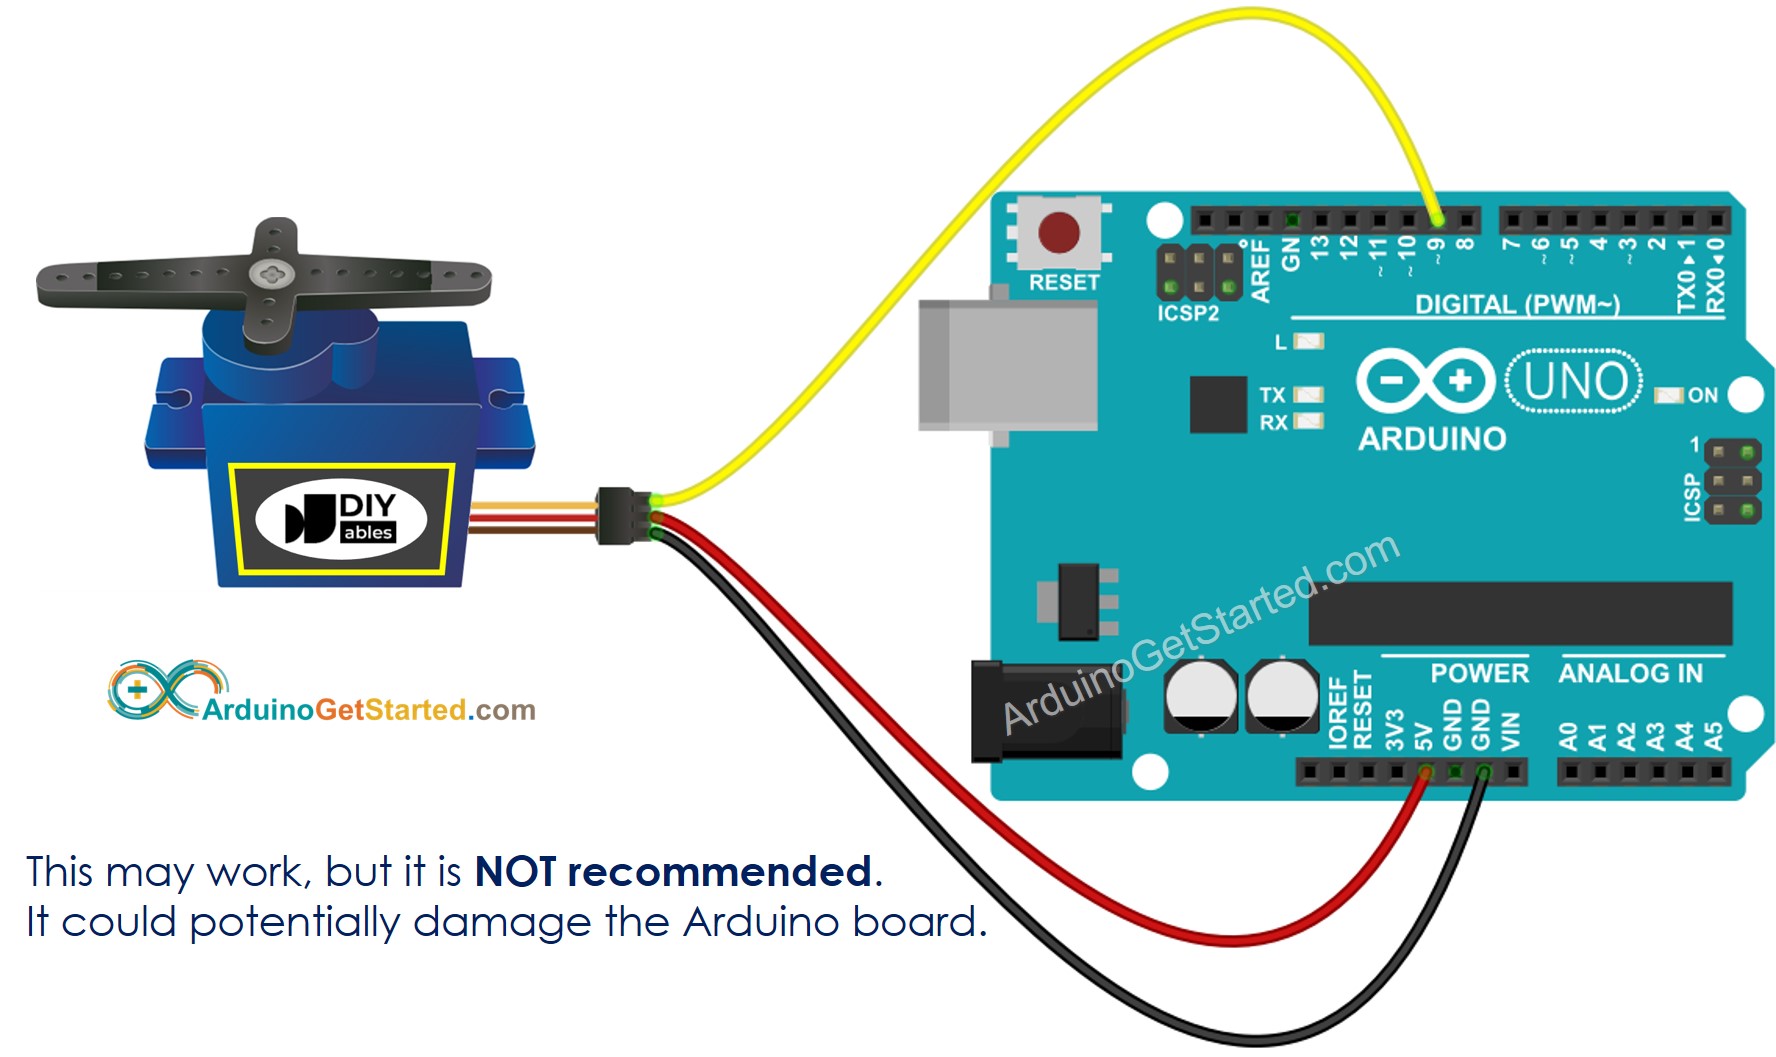
How To Program For Servo Motor:
- Include the library:
- Declare a Servo object:
If you control more than one servo motors, you just need to declare more Servo objects:
- Set the control pin of Arduino, which connects to the signal pin of the servo motor. For example, pin 9:
- Lastly, rotate the angle of the servo motor to the desired angle. For example, 90°:
Arduino Code
Quick Steps
- Connect Arduino to PC via USB cable
- Open Arduino IDE, select the right board and port
- On Arduino IDE, Go to File Examples Servo Sweep example
-
- Click Upload button on Arduino IDE to upload code to Arduino
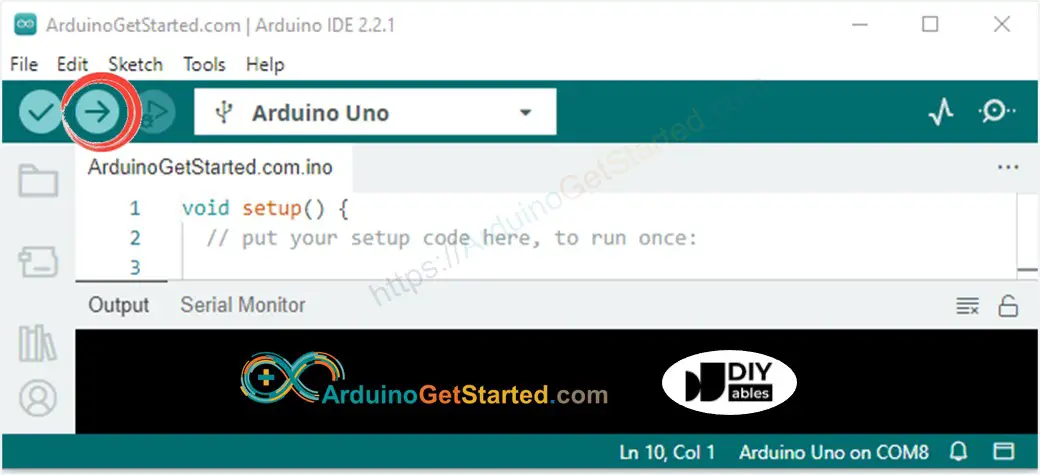
- See the result: Servo motor rotates slowly about 180° in clockwise and counter-clockwise direction
Video Tutorial
We are considering to make the video tutorials. If you think the video tutorials are essential, please subscribe to our YouTube channel to give us motivation for making the videos.
Challenge Yourself
Use the servo motor to do one of the following projects:
- Controlling the position of a servo motor using a potentiometer. Hint: Refer to Arduino – Potentiometer .
- Automatically opening/closing the dustbin. Hint: Refer to Arduino – Ultrasonic Sensor .
- Controlling Robotic Arm
Additional Knowledge
- The Servo library supports up to 12 motors on Arduino UNO and 48 on the Arduino Mega.
- Power from 5V pin of Arduino maybe NOT enough for servo motor in one of the following cases:
- Using a high-torque servo motor, which can carry a high-weight thing.
- Using many servo motors.
In these cases, we may need to provide an extra power source for servo motor.
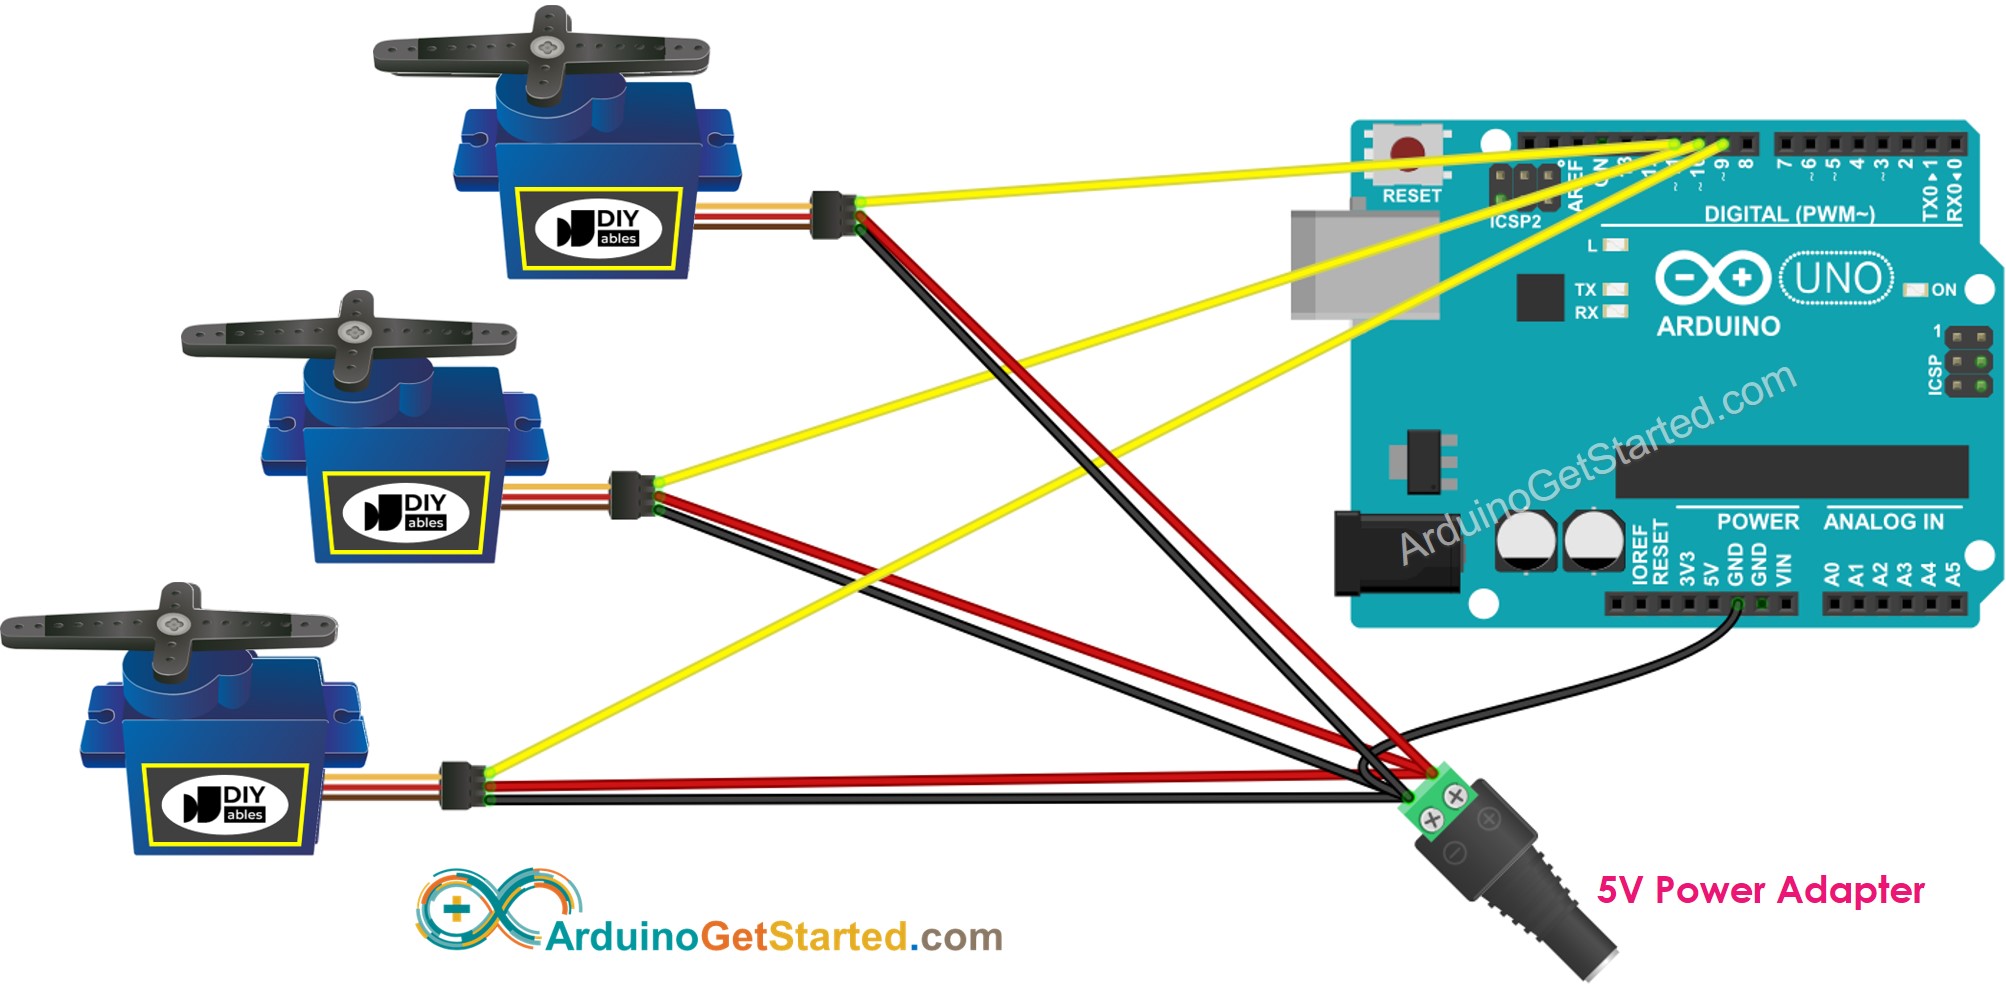
As we can see in the above diagram, the VCC pin of servo motor does NOT connect to the 5V pin of Arduino. It connects to the positive pin of an extra power source. The negative pin of extra power source is connected to the GND pin of Arduino.
Alternative Servo Motors
The above code also works with the following servo motors:
- MG996R – Metal Gear Torque Servo Motor for high weight application
- SG90 Micro Servo Motor for low weight application
- And other standard servo motors
Function References
- Servo.attach()
- Servo.write()
- Servo.writeMicroseconds()
- Servo.read()
- Servo.attached()
- Servo.detach()





0دیدگاه